I am loving the 100happydays project! I decided to do a photo to represent a happy moment for Bennie, Tuesday and I.

My happy moments: 1.Tuesday singing in the car 2. family dance party 3. Mexican food 4. roses for our anniversary 5. Bj brought me home a Pinterest shirt 6. Breakfast pies in the freezer (and eggs from a friend!) 7. site of a three hour nap (trying to recover from a bad cold) 8. spring is here! 9. squeezing in a tiny bit of scraping

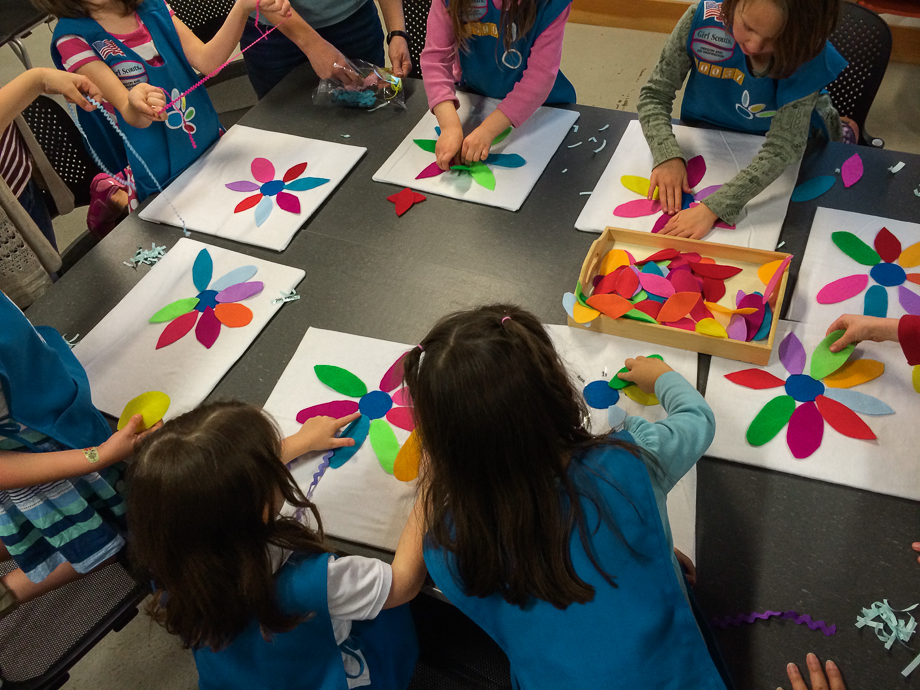
Tuesday’s happy moments: 1. splashing in rain puddles 2. at the RC track with papa 3. checking out at Goodwill 4. legos 5. Forest School 6. Our daisy meetings are at a sustainable community and this night we toured the greenhouse 7. Pjs in the car on the way to grandma and grandpa’s house 8. getting the garden beds cleaned out 9. request for lunch, granted

Bennie’s happy moments: 1. riding the bear at the book store 2. toddler antics 3. always happy swinging 4. dancing in the aisles at the pizza place 5. walking through the forest 6. peek-a-boo 7. first cutting and gluing, she loved it 8. selfies! 9. bedtime dancing
This project was super easy some days (every thing is great! no one is breaking down!) and hard others (vomit! coughing! screaming!). I thought it was so good to focus on the happy moments and Tuesday is a big fan too. Here’s to happiness!!

Celebrating crafts, kids and the everyday through photographs.
-
5 comments on Happy Days
-
Joining in on Amanda’s this moment project. A moment from the last week. A slice of life. -
When I scrapbook I tend to work in little bits here in there. Lets be honest, little bits is how I get most of my crafting time done. I do get bigger chunks, but it seems like I have to be ready to drop it at a moment (baby wakes up, pot is about to boil over, phone rings, etc.). So I have to have my projects in a place I can get to them, but one that little fingers won’t find so tempting or easy to get to. Project Life is one of those things that I have out a lot. It lends itself well to doing little bits at a time. Printing the photos (I do this at home), pulling out cards, dressing them up with stickers, journaling… I rarely do all of that in one sitting. But one thing that was driving me crazy was having a giant 12×12 scrapbook open on my desk. It takes up pretty much the whole working area. Plus it’s awkward and slick to be working on top of the page protectors. When I had everything laid out then I had to lift up one side of the plastic to get my photos in. Like I said, annoying.
It’s huge! The book measures 33 x 13.75 inches open! I came up with a solution that is so easy! I saw on Marcy Penner’s blog when she was doing this size Project Life that she had something similar, I caught a glimpse of it in one of her videos but never found more info out about it.
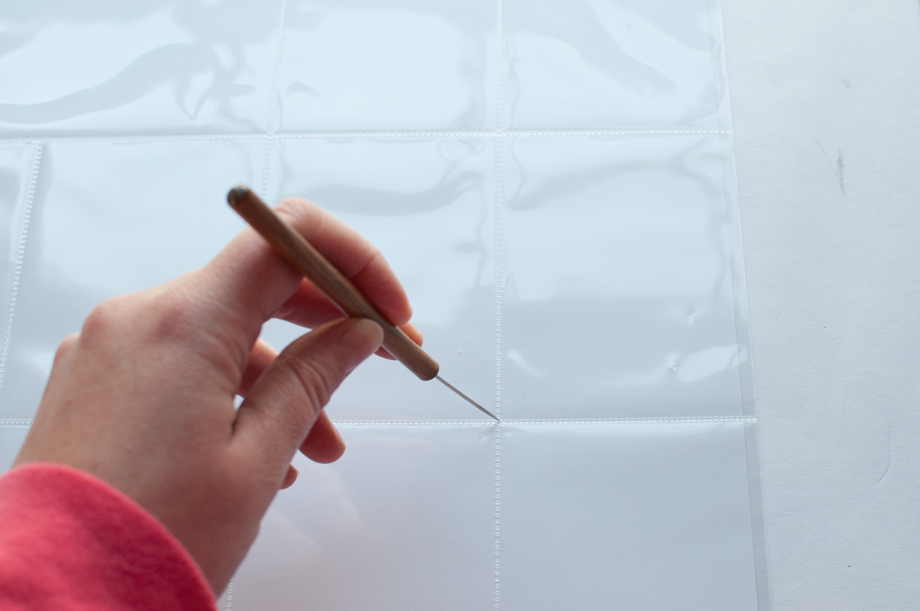
I made my simply by laying a page protector over a sheet of 12×12 white cardstock (the plastic is bigger than the paper, just make sure it is hanging out evenly). I took a small awl and poked a hole in the intersections of the individual pockets (it does not damage the page protectors).
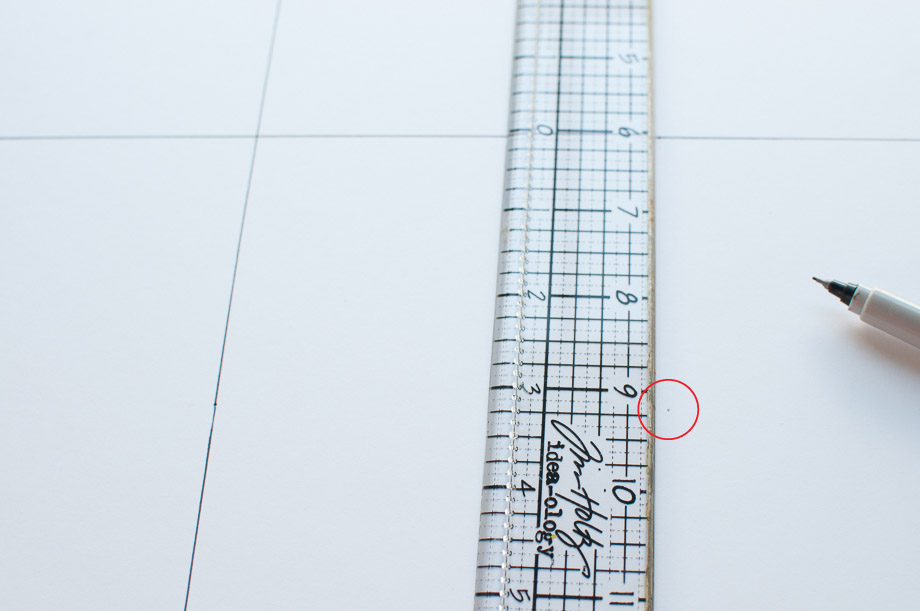
Then I simply took a ruler and a sharpie and connected the dots. It’s important to note that the outside “pockets” will be too small. That doesn’t really matter as this is more of a visual guide, than an exact thing. You can see in the photos that the pictures “hang off” the edge of the paper. It doesn’t bother me enough to search out bigger paper.
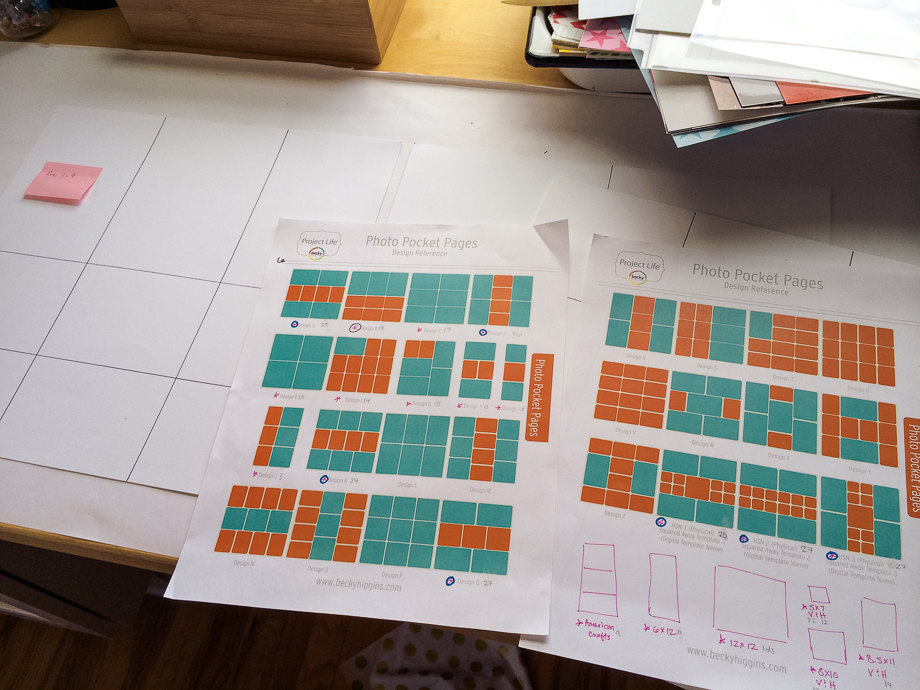
I printed out Becky Higgin’s handy (and free) reference sheet. Under each style I stared it if I owned some and put in pencil how many. If I’ve made a template for the style I circle the star.
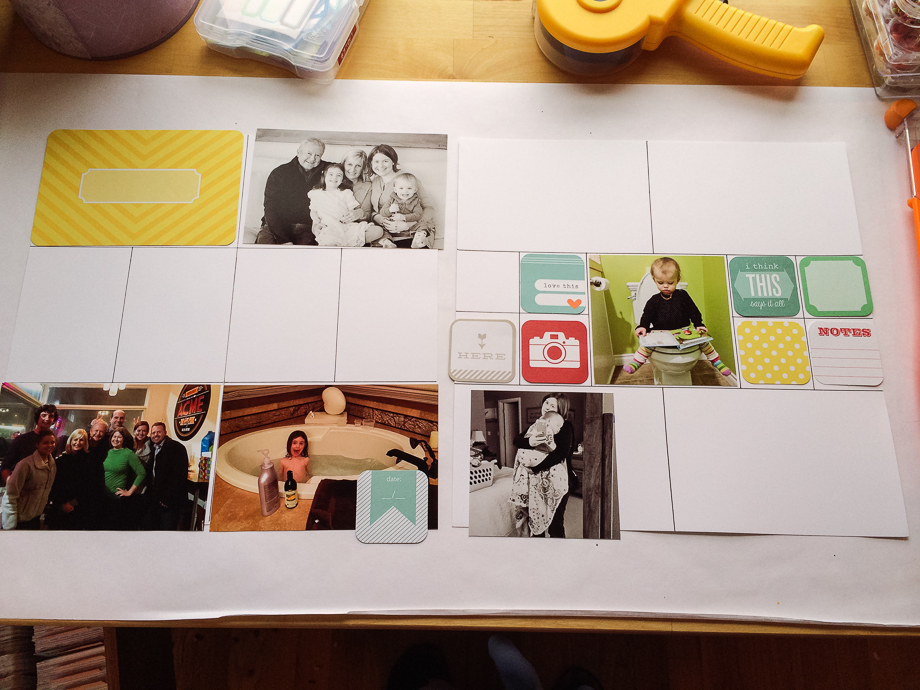
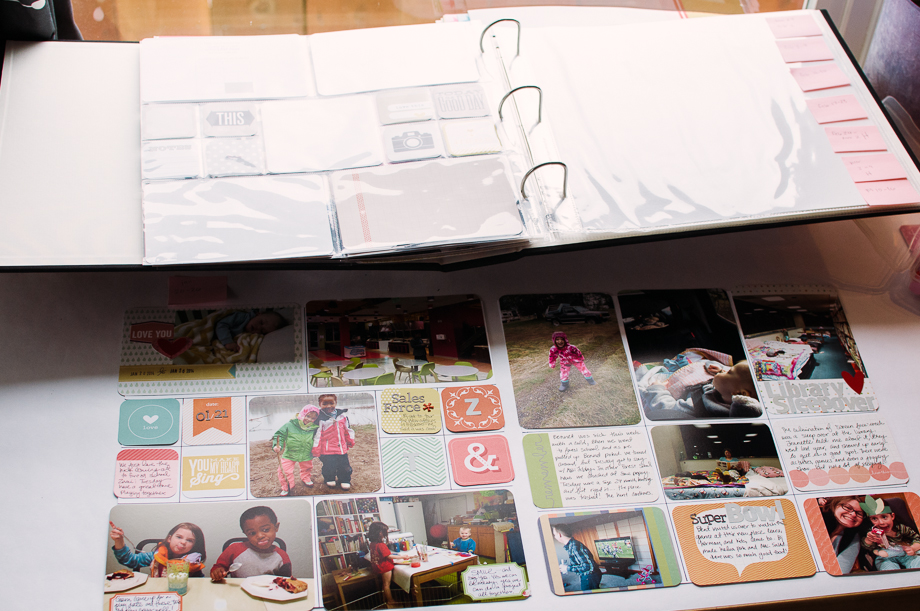
Here is a shot of it in action. In this case I’m still working on printing out my photos and filling in with cards. Once I’ve decided what will go in all the pockets I get out the album and fill it up!
I can’t tell you how much better I love this system. Having the project be totally flat means I can put stuff on top of it if I need to (like a tray from another craft project). I’m sure piling up projects in process is not for everyone, but I like the option of getting things up on one of the highest surfaces in my house (Bennie has sticky fingers!). I’ve added lots of photos to show how to do it, but really it’s a super easy and quick system to implement. If having the album out is driving you nuts try this!
And let me know if you would be interested in a general overview of how I put my weekly spreads together. I really have it down so they are super quick, but can be more embellished if I feel like it.


recent posts
archives
2 page layouts 8.5×11 layouts 12×12 layouts Alaska birthday birthday party brads canning Carmen Chloe crew girls dining room DIY elimination communication fair fall food front yard hair Halloween iPhone misting Montessori newborn nighttime night time oregon oregon coast oregon state fair organization painting painting with kids party portland punches ribbon salem Sciarrino scrapbooking sewing on scrapbooking Silhouette sleep toddler Tuesday tulips