Life in Color mixed-media collage banner with vibrant patterned stripes and stitched edges, abstract art design.
Celebrating crafts, kids and the everyday through photographs.

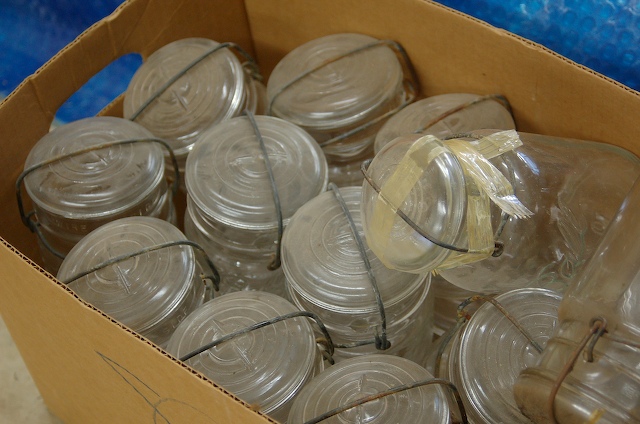
  • So Saturday Bj and I went on a jar hunt. And I came out with a ton, a ton (well not a ton, 118 to be exact). So I decided the roll top desk in the ribbon room had to go. I wanted to create something perfect for the space. I drew it up on Saturday night, built it last night, and stained it today. It’s brilliant if I do say so myself. Oh I just can not wait for the varnish to dry so I can put all my stuff in it. I am so not good at waiting for these types of things. So I thought while I was waiting I would blog about it first, and get you all excited to see pictures. The place it is going is under the eves of the house so the ceiling is slanted. The wall only goes straight up 33 inches so I made it 32.75 inches, just in case. Which is good because now I think I want it on feet or something. Hmm, they’d have to be tiny feet. So anyway I thought it might be fun to go through the building process.

    1) I made a detailed plan, even using algebra (!) in case my material was a different width than I anticipated.
    Directions
    I did end up changing those dimensions a little bit, the cabinet is now 20 inches deep, and only 48 inches wide. This is due to the material coming in 4X8 feet sheets.

    2) Ask dad to help you, as material will not fit so easy in old luxury sedan, and much better in a Yukon.

    3) Go to Home Depot and get supplies. Be really girly and get the helper person to do many cuts for me for free. Now that we have acquired supplies we will start to build. Wait…. get out to the car and decide to go back in to get an extra drill bit for wonky screws, just in case.
    Recipet

    Hmm, still a little wacom tablet retarded after two years. Oh well. Okay so I am going to try and take back one of the cans of varnish and some brushes. My total after that will be 134.33. And if I could take back the “TEMP HDBD” (masonite) I would because I don’t think I’m going to put a back on it.

    4) Schlep everything to Dad’s garage and start putting it together. Take apart first side due to lack of following directions and re put together.

    5) Order pizza.

    6) Take out recycling and garbage.

    7) Back to work. Glue and tack shelves to sides with carpenter’s nails. Then screw in with wonky screws. Measure and screw in other side. Strip a few screws and go get pliers to get them out. Finish!!!

    8) Clean up and go eat pizza.

    9) Hope new unit fits in Yukon. Phew it does, schlep it down the street to my mom’s, rotate cars and put it in the garage.

    10) Sleep, but dream all night about putting all the jars away in cool new shelving unit!!!!

    11) Get ready for day and grab iron, head out to garage.

    12) Iron on little strips of wood backed with cool heat activated glue to cover up where the plywood was put together (I’m not describing this well am I?).

    13) Cut excess (actually kinda difficult until I realized it could be cut easily with scissors, see I had to get 7/8″ thick strips, but my wood was 3/4″m annoyingly). And sand like crazy.

    14) Breathe in large amounts of dust, but keep sanding because you’re so excited.

    15) Clean and varnish, laying on floor of garage, when needed, to get appropriate angle.

    16) Open garage and realize you have been inhaling deadly fumes.

    17) Do other stuff for 3-4 hours (or if you’re antsy 2.75-3 hours).

    18) Try sanding again, like varnish recommends, decide: a) too timely and b) looks bad, so

    19) Varnish again!

    20) WAIT 24 HOURS!??!?!

    21) Wait 5 hours get so bored waiting you have to blog about it.

    That’s me right now. Oh, let’s see if it’s dry enough to move inside so it will completely dry fast. Ahhh I can’t wait!!!! (Check my picture of the day for a preview). And if you’re interested in that oak roll top, it’s on Craig’s list baby.

    6 comments on Cabinet Making 101
  • Happy Valentine’s Day!


    Remember these things? Ya, haven’t worn them once (beside the photo shoot). So let’s talk about socks.

    Let’s talk about socks, baby
    Let’s talk about you and me
    Let’s talk about all the good things
    And the bad things that may be
    Let’s talk about socks
    Let’s talk about socks

    ah hahahaha, I could keep replacing socks for sex through out that whole song, I’m cracking myself up here, maybe that’s because I’m going insane from my sock fiasco!!!! I mean shit, I go to all this trouble to make my self these awesome soft super custom socks and they don’t even fit, you have got to be kidding me!!! So I took this sock knitting class once. I’ve since decided that the teacher was supremely horrible because she did a lot of the things for us, like picking up stitches, and reading the patterns, instead of teaching us how to do it. Now, I was at the super awesome Weaving Works in Seattle and I told one of the SUPER AWESOME sales woman my dilemma. No pattern seems to fit, blah, blah, blah. She was like so helpful times ten. They have an awesome book/library area. So she gave me some books to look at, but said I should just read them a bit, but probably didn’t need to buy them since I knew how to knit the sock, it was the size that was giving me problems. Then she found this four dollar do-it-yourself pattern thing for me and baby, it rocks! I of course had to get lots of their fabulous fingering weight yarn, so I could make some more. And let me tell you I’m almost done with one sock and so far it fits perfect!

    So what to do with these other socks? Well that’s where you come in my dear readers. I want someone to have them who would really like them. The pattern recommends hand-washing, but I think you could machine wash. I’ve hand washed them to block them out. Then let them dry, then put them in the dryer to try and shrink them (did not work). So you could definitely dry them hot. They are meant to be a little slouchy, but I couldn’t get two steps with out them falling down way too much. So I’ve made some requirements since I want these to be worn (after all they are like a frigin 35 dollar pair of socks, PLUS labor). So here are my measurements:

    heel to longest toe: 9 inches
    ankle: 8 inches
    thickest part of calf: 13.5 inches
    measurement around thickest part of foot 8 inches
    shoe size: 7.5 or 8

    If you would like to be considered for adopting the socks (which I will ship out on Thursday as long as I have a few takers) then please reply with your sizes. I think the smallest shoe size would be like a nine or something. And (I’m not saying this to be mean), but a hefty ankle might help too. My ankles are scrawny, and my calf too tiny for these socks. So all your measurements should be bigger than mine. I’m really hoping some one wants these socks. All this work, ahhhh.

    In case there are more than one takers with good sizes (to be determined by me) then um… I guess tell me why these socks would be happy on your feet in your home (example: good hardwood floors for sliding).

    11 comments on Let’s talk about Socks
  • While brother was taking a nap.

    Looking out my bedroom window.


    Karsen_4
    nnnnnnnnnnnnnnnnnnnnnnnnnnnnnnnnnnnnnnnnnnnnnnnnnnnnnnnnnnnnnnnnnnnnnnnnnnnnnnnn
    That was Karsen on the keyboard, she says hi.

    6 comments on Impromtu Photo Shoot

archives

2 page layouts 8.5×11 layouts 12×12 layouts Alaska birthday birthday party brads canning Carmen Chloe crew girls dining room DIY elimination communication fair fall food front yard hair Halloween iPhone misting Montessori newborn nighttime night time oregon oregon coast oregon state fair organization painting painting with kids party portland punches ribbon salem Sciarrino scrapbooking sewing on scrapbooking Silhouette sleep toddler Tuesday tulips