If you’ve been quilting for a while you’ve probably heard of the Jelly Roll Race. A Jelly Roll is the name Moda (a fabric company) gives its 2.5″ strip sets. The Jelly Roll Race quilt has been around for a while but I think this YouTube video really made it popular. Basically you take all your strips from the Jelly Roll and sew them together for one long (really long!) strip. Then you fold that strip in half and sew the long ends together, clipping when you get to the end. Repeat over and over and ta dah! A quilt top. This is what I did but decided to add more strips to make it bigger. Well it turns out you can’t just do that. Which is how I ended up with two quilt tops instead of one!


It ended up being a “happy accident” (as my printmaking professor would say). Tuesday has a sweet friend who is always swooning over my work. Well he only had to say how much he loves it so many times before I had to make him his own quilt. This was a lot like one he had book marked in one of my quilt magazines so it was a great fit. His (with the blue and green background) has his named stitched in it and then lots of random patterns. I did more of the same for our quilt (this will go in our living room) and also stitched our names and “2017 love mama” in it.
I used Cloud 9 organic cotton solid for the backing. I am so in love with this material (available at Jo-Ann’s. It washes up as soft as a cloud! I am finishing up a quilt for Bennet right now and am using the same material (in pink).
The final size of each of these is approximately 51×64. If you did want to customize a jelly roll race to a size you want I found a handy PDF (after the fact of course).
This was a really fun fast project and I would do it again, just paying more attention to how much fabric I was using!

Celebrating crafts, kids and the everyday through photographs.
-
4 comments on Jelly Roll Race (fail/win)
-
I love having a simple knit I don’t need a pattern for to take with me and knit all over the place. This is that pattern for me. I found a blanket I loved on Ravelry and modified the pattern a bit. I cast on in the middle and knit around and around. Every other round I switch colors for a truly scrappy look.


Here are the details for this blanket. It finished at about 34″ square. And links to the first, second, and third blankets. Like I said I love these blankets. They take about a year for me to knit so if you’ve gotten one from me I must really love you! -
I think my rope bowl post might be one of my most popular, based on the comments I’ve gotten. I’m glad you find it so useful. I thought I would update you with a some new bowls I whipped up last night.
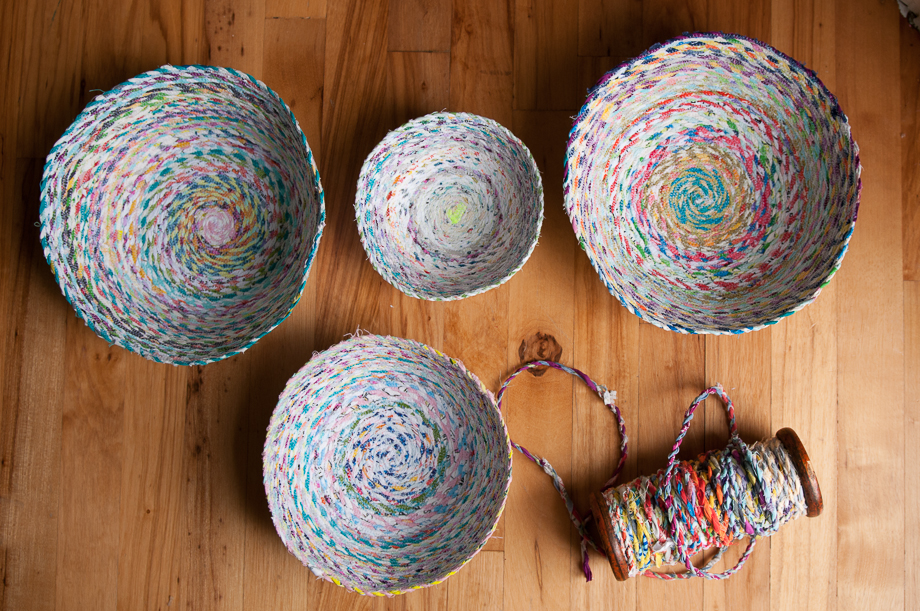

Instead of using a store bought rope, cord or twine I made my own. I used this tutorial from My Poppet Makes to make twine out of scraps too skinny to sew with. I like using this technique because I sew a lot and when squaring up and taking off salvages there is a lot of waste that I hate throwing out.
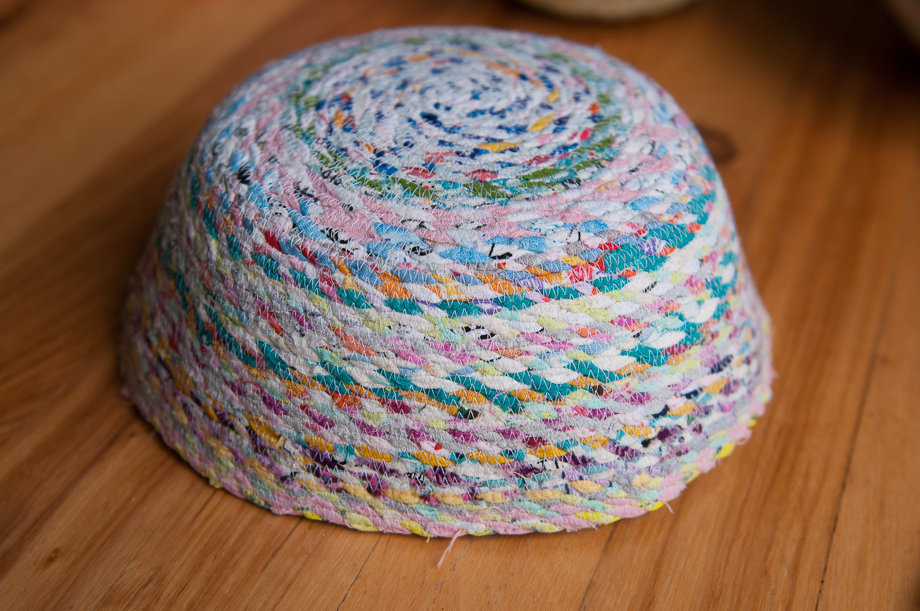
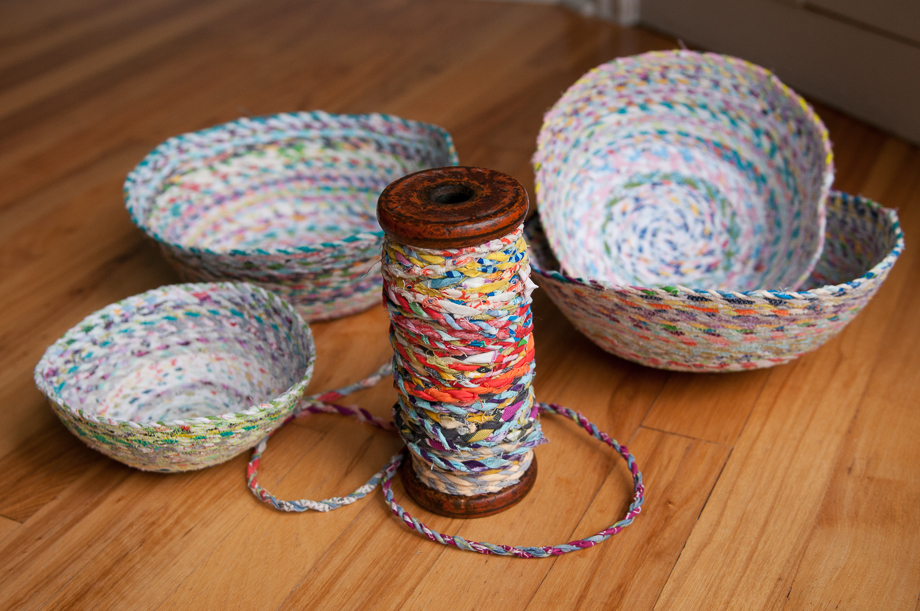
If you want to make some bowls using this recycled twine I have some tips for you. The twine you’ll make will be more thick and thin, but for me that didn’t matter too much. Using a wider zig zag stitch allowed me to catch each side and really cinch it together. I didn’t need to use a jean needle like I do for the rope baskets, a universal worked fine. Because the twine you make is so much more malleable you can either do a flat coaster shape and then tilt up or slowly tilt up for a very round bowl. I used neon green bobbin thread for the smaller bowl (this is the thread color that ends up on the outside) but I ended up like white the most. I think it shows off the color variation. Monofilament thread (“invisible thread”) could also be a choice but I really dislike using that stuff.
The bowl that is 9.5″ in diameter on the top used 4 ounces of recycled twine. The small one (about 6″ across) used about 1.6 ounces of twine. I was surprised how much this little spool of recycled twine made. I had packed the bobbin (a vintage one that was a gift) full over various car rides and kid activities, using a giant zip lock full of scraps. Last night when I went to make the bowls I was going to use it all up… but I still have a lot as you can see. The twine making process can be a bit fiddly at first but it becomes easy. Try to make enough for a small bowl and see if you like it.


recent posts
archives
2 page layouts 8.5×11 layouts 12×12 layouts Alaska birthday birthday party brads canning Carmen Chloe crew girls dining room DIY elimination communication fair fall food front yard hair Halloween iPhone misting Montessori newborn nighttime night time oregon oregon coast oregon state fair organization painting painting with kids party portland punches ribbon salem Sciarrino scrapbooking sewing on scrapbooking Silhouette sleep toddler Tuesday tulips