I recently realized that I had a LOT of unfinished quilt tops. I decided to do something about it and in a little over a week I basted, quilted and bound nine of them! Since I’m not going to keep them all I thought it would be a good time to resurrect this blog and make notes on them here.


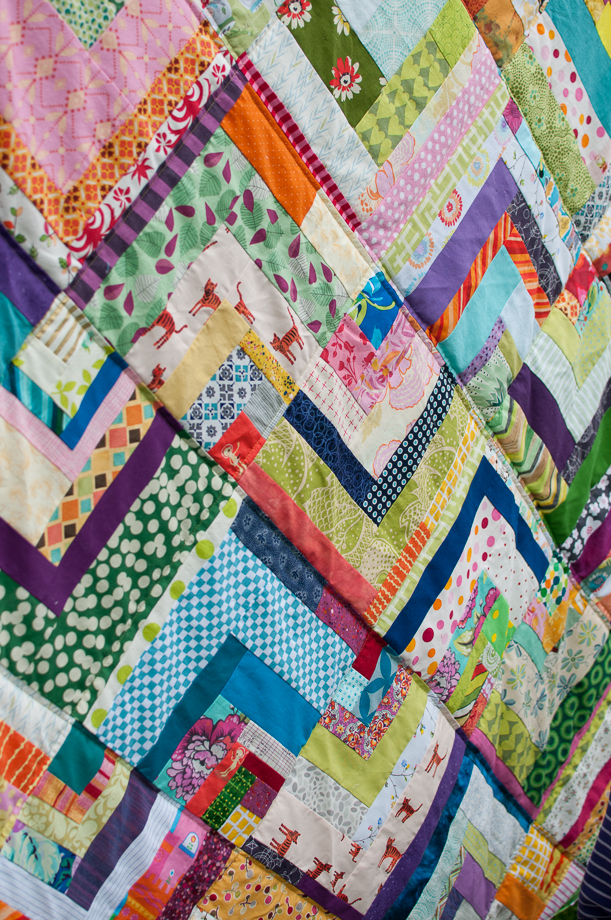
Trailer Log Cabin 45″ x 45″
This quilt I think I am going to keep, at least for a bit. It’s special to me because I started piecing the top over a long weekend in our trailer. The girls and I were alone in it during a few rainy days while my husband took the car, leaving us at the campground. It was such a cozy fun time. I only brought a basket of scraps with me, including a large remanent of a Carolyn Friedlander print I love that ended up being the center of each block. After the orange criss cross I chose colors I had on hand and slowly added to the quarter log cabins. Once home I got them up on the design wall I decided not to square up the centers.
I used a walking foot with my Juki to quilt this (which was easy with low loft 100% cotton batting). I machine stitched on the binding. I’m doing this for almost all my quilts now. I’ve gotten better at it and it is so much fast. A good thing when you’re finishing nine quilts! This one is going to live on the big reading chair in our bedroom for now.

Celebrating crafts, kids and the everyday through photographs.
-
No comments on I’ve been quilting….
-
Oh my goodness my blog is dying one of those slow blog deaths, oops. I still want to put some projects on here though, for myself to remember. It’s actually what I use my blog for the most, to check out when or how I did an archived project. Remeber the wedding quilt I made my friends? Well they had a baby and I made her a quilt!


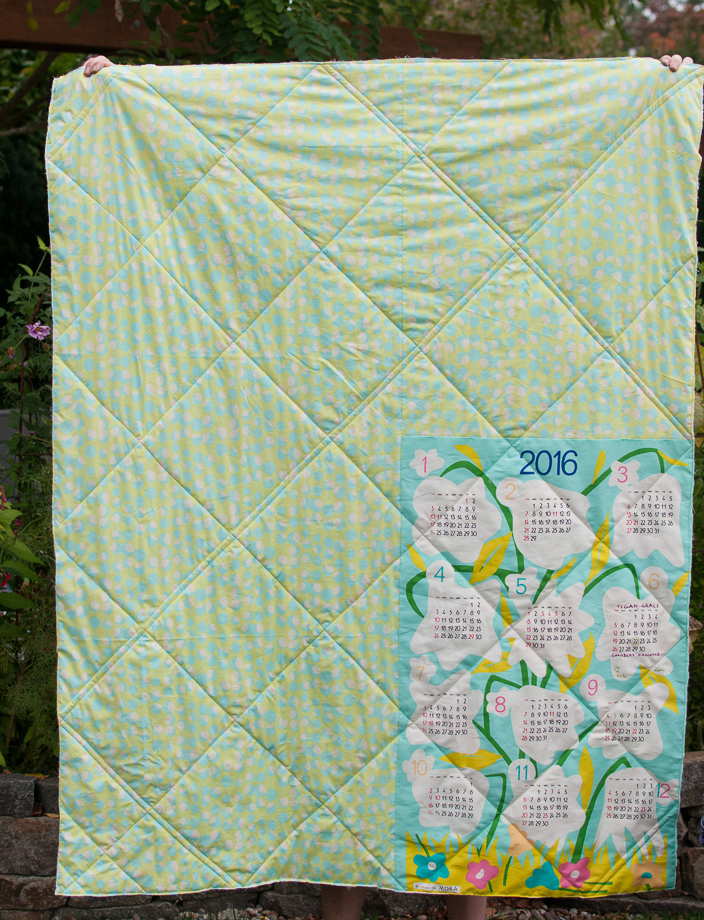
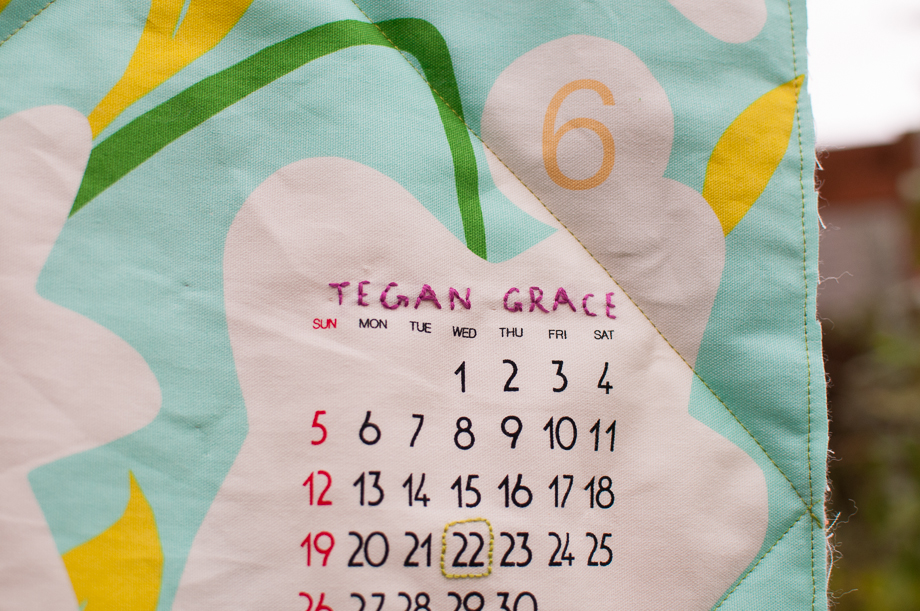
My friend Rachel made a quilt similar and walked me through the top. The back was so fun because I found this awesome panel when I was in Japan this summer. I love how it turned out. Of course I waited until the last minute to finish the quilt so these pictures are from before I put the binding on (which I knew would happen after the sun went down!).
Bennet wanted to jump in (haha) the picture. And oh hey we added a whole new section to the yard. Maybe I’ll share that soon… 🙂 -
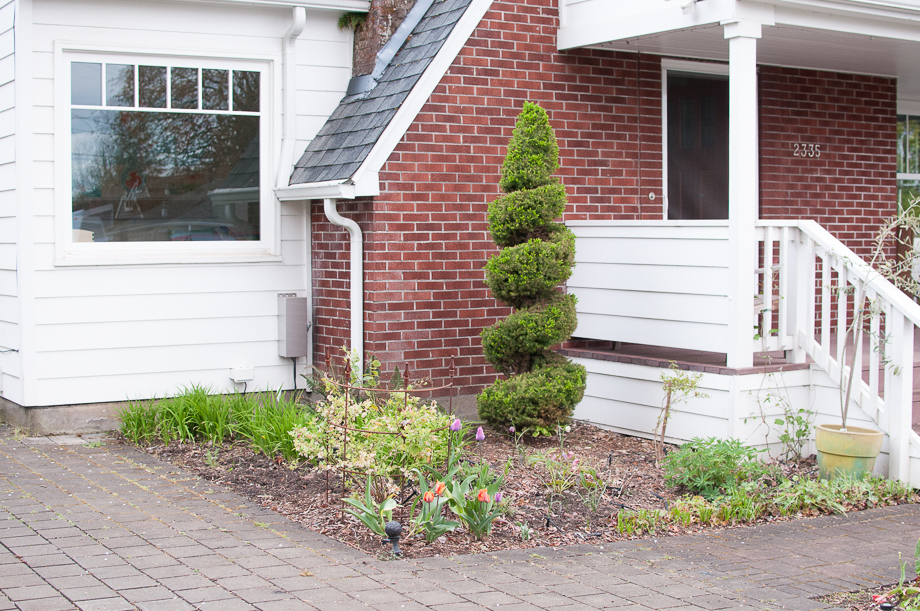
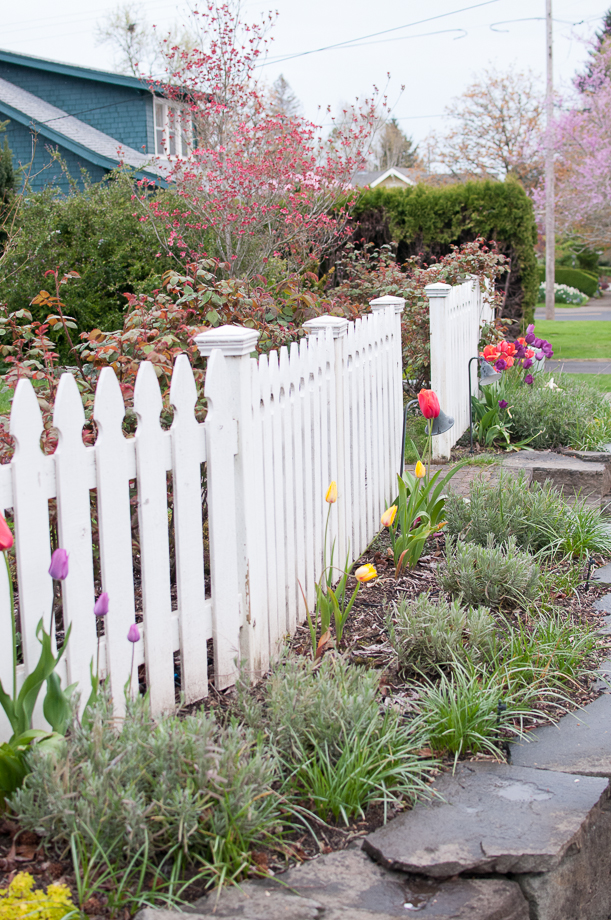
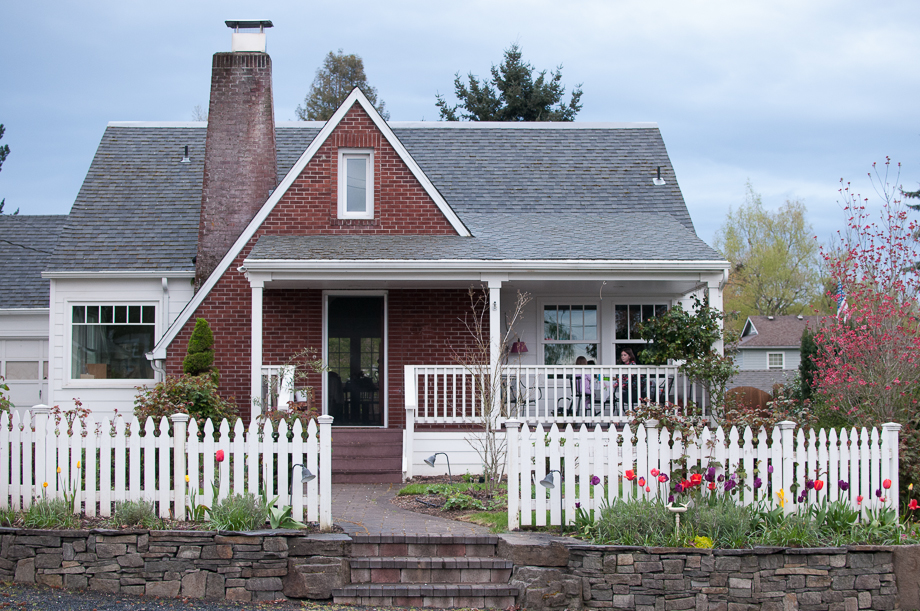
I haven’t done a garden update since fall of 2014, I owe a lot of that neglect to our awesome trailer. Last year we just wanted to go, go, go! This year I came at the yard with a big deficit since I didn’t do enough weeding, and no mulching. This ment so much of my garden was being taken over by weeds! I also knew I needed to move a few bigger plants last year and didn’t do it. This year I have to or things are going to get too crazy and crowded. I managed to snap some photos of my front yard last night as the first rain in days blew in and started sprinkling. After a few weeks worth of work it is looking much better.
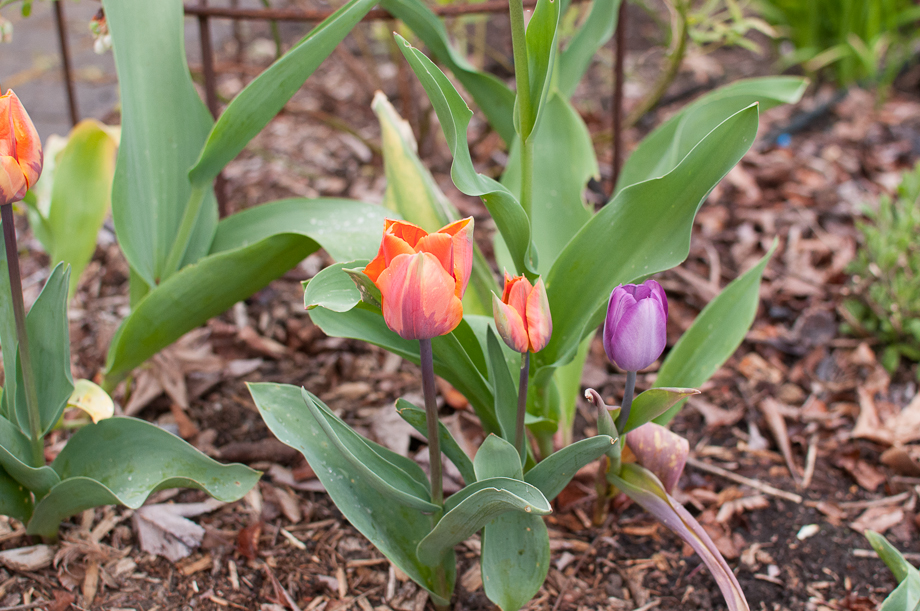
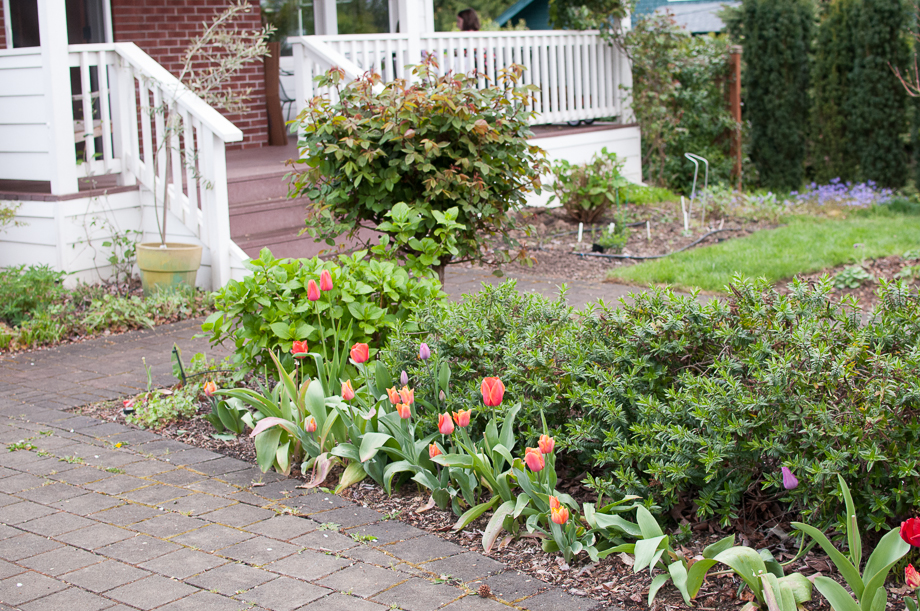
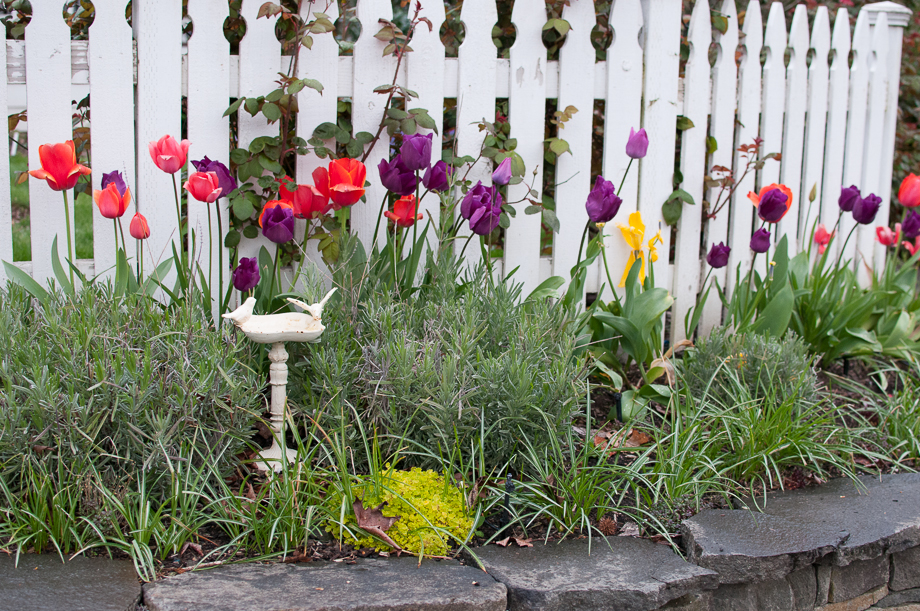
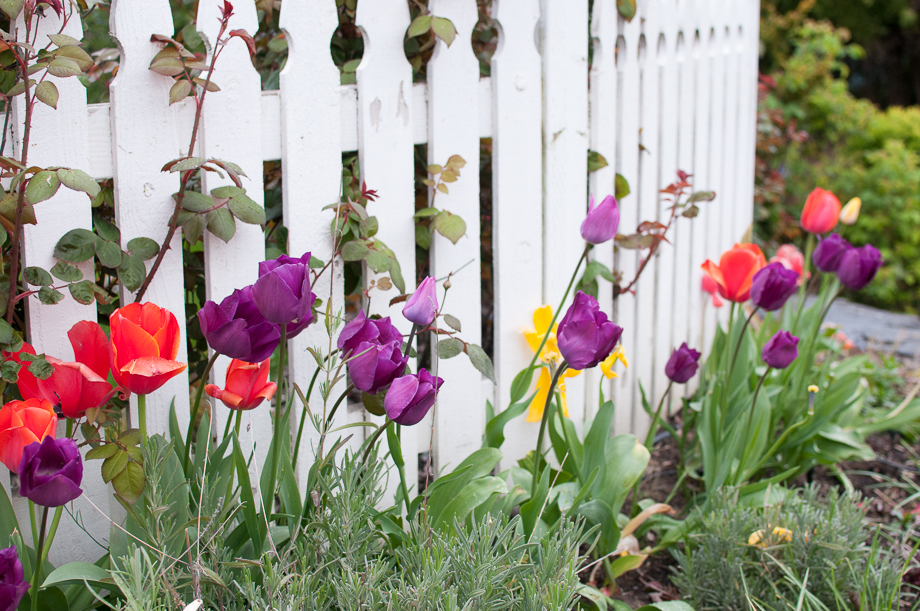
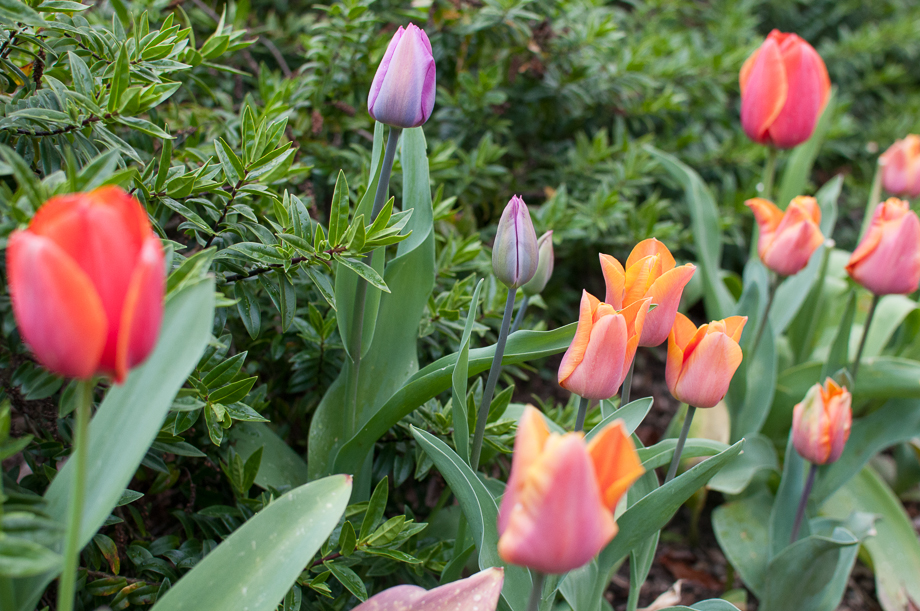
I love that my Princess Irene tulips are finally taking a foothold in my garden. I love them.
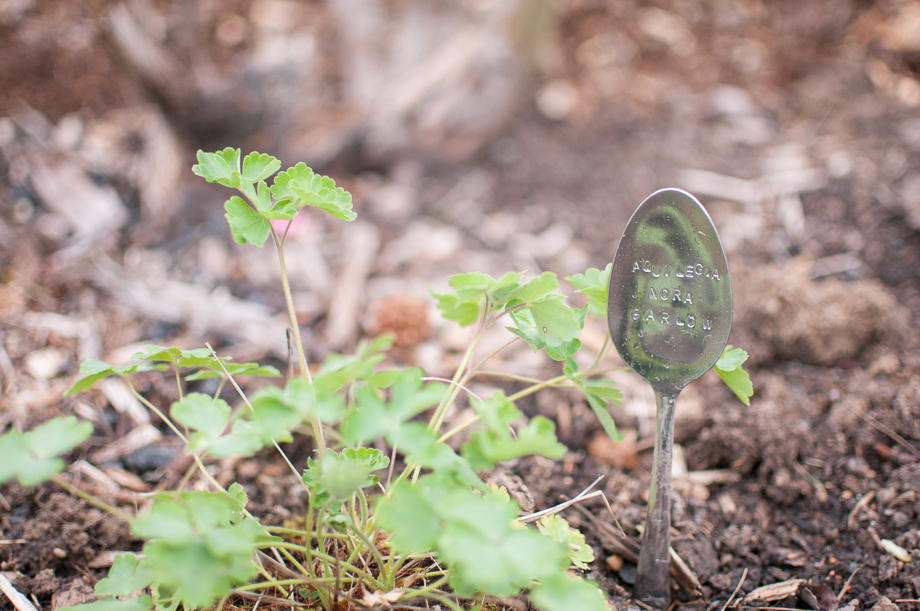
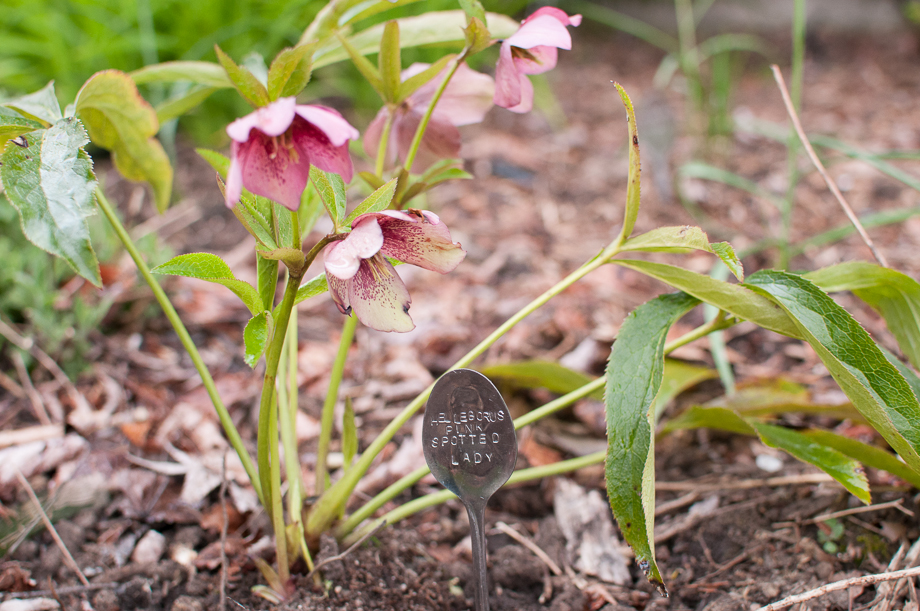
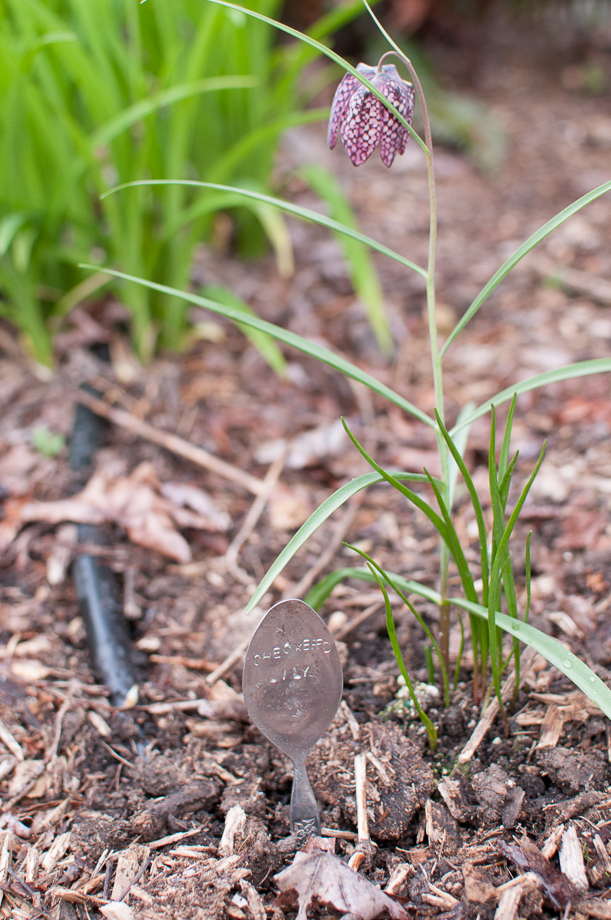
I’m addicted to making plant markers! I have had no success with the many, MANY other kinds I’ve tried. Our combination of rain, rain, rain, plus sun in the summer makes any kind of marker just fade away. I knew imprinting into metal was the only way. I ordered this inexpensive set of metal punches, along with block steel (important, it makes it work so much easier), and used a sledge hammer (the little jewelry hammer I got did nothing). You have to use cheap or silver plated flatware. Let me know if you want more info on them and I’ll throw up a tutorial. If I have multiple plants of the same variety I have been doing one in the common name and one in the scientific name, as I’m trying to learn more of those.
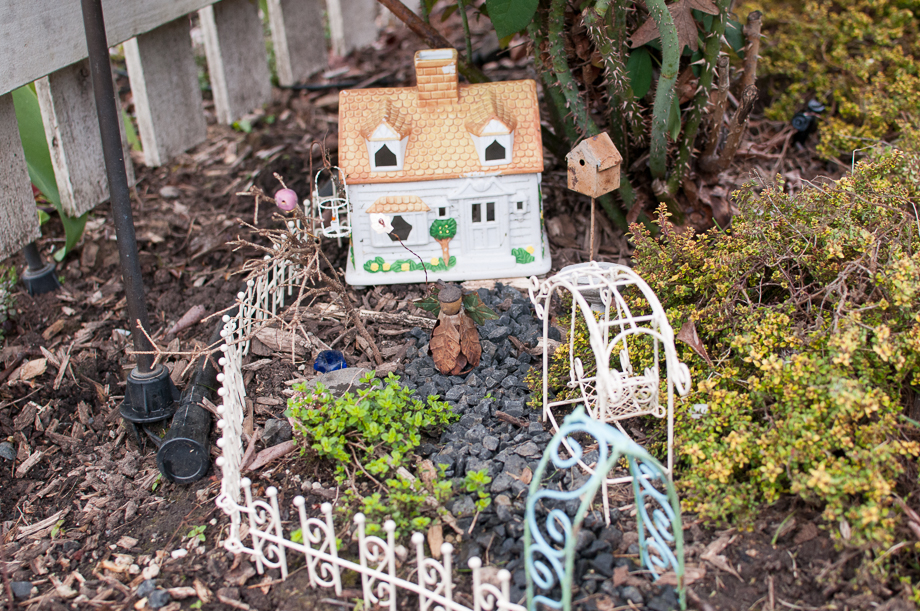
Tuesday has moved her fairy garden to the front right when you walk in. She has more plans for it.
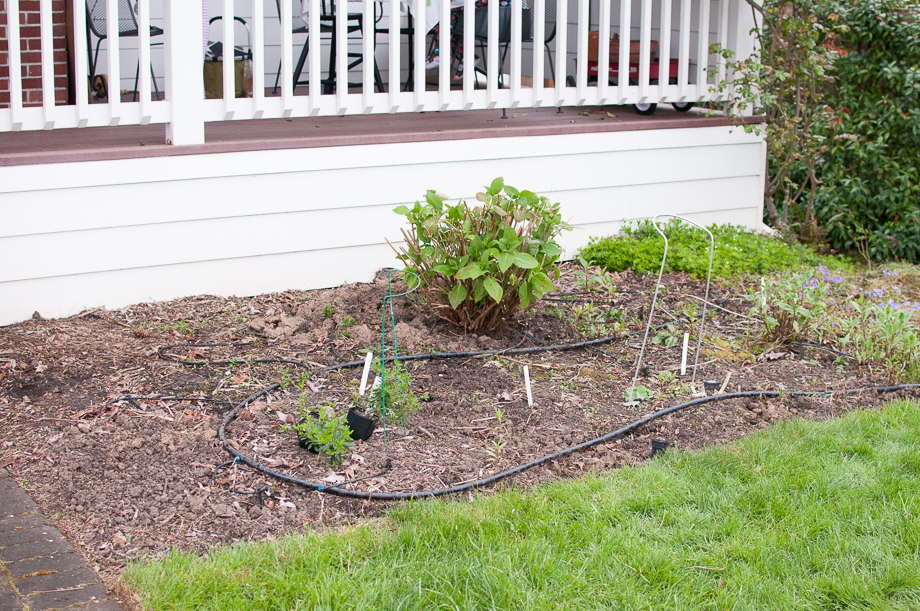
Right in front of the porch I moved a neighbor’s hydrangea. Last year this place was a riot of color as I grew flowers for a friend’s wedding, but the rest of the year bare, bare, bare. I’m going to move two more hydrangeas from the back and got a few other plants to tuck in there. Plus I think I’m goign to grow sunchokes, as Bj wants to cook with them, and they would complement the sunflowers I always grow here. Maybe in a pot…. they do scare me a little (they spread).
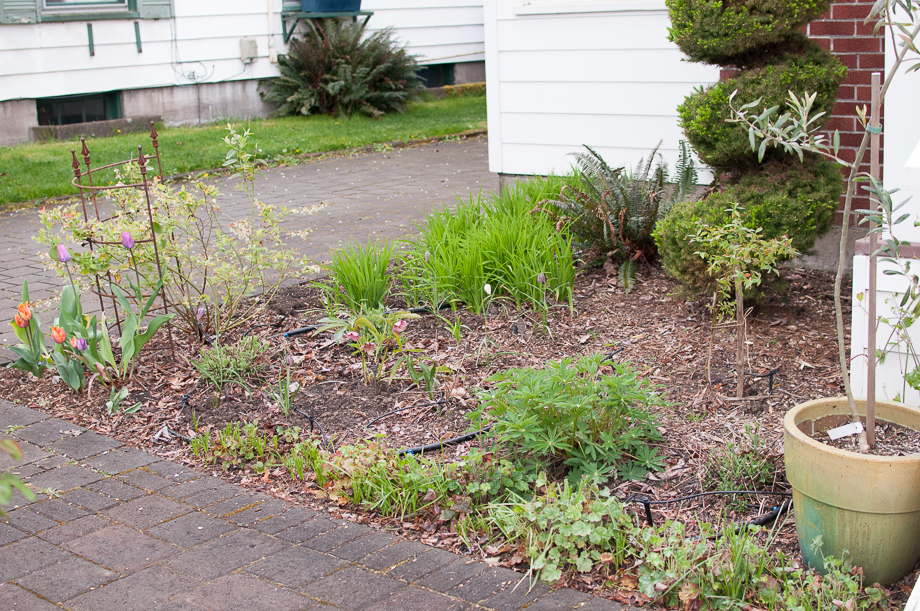
I’ve added some early spring color in the form of perennials to the my front garden; while it is a riot of color later in the summer right now it’s quite plain. I’m especially taken with the checkered lily, they look pixelated! These, along with a few other new things I’m working on getting into the backyard, are from an awesome nursery called Wild Ginger. It’s very out of the way, but oh so worth the drive if you’re anywhere in the valley! The woman there walked me through the hoop houses and helped me with some problem areas I have in the backyard (like my shady swamp by the play area).
The area to the left of my porch is waiting for a special delivery, a bareroot apricot tree! I am so excited about the tiny little dwarf I ordered. It’s actually on micro dwarf rootstock so it should stay really tiny, be protected in that area, get lots of sun and give me lots of apricots, which I LOVE. Yum, yum, yum. Also spring blooms right in front of my picture window, yes please!
The area around my vine maple I took everything out of. I had been scared to divid my lady’s mantle and as a result it got woody and took over. I divided it, shared some with friends, and put a little back in the bed, along with a few other plants. I may add some poppys for a splash of later summer color, we’ll see.
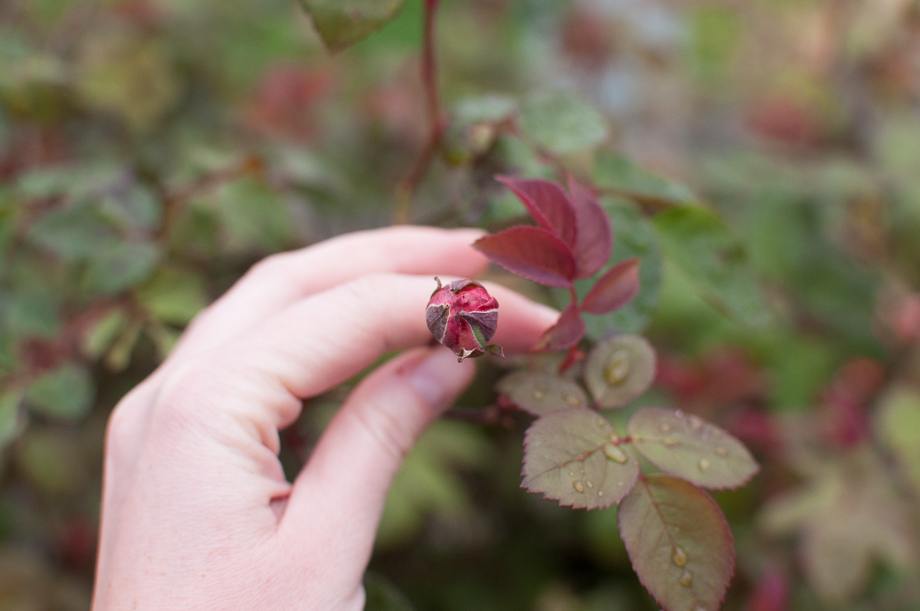
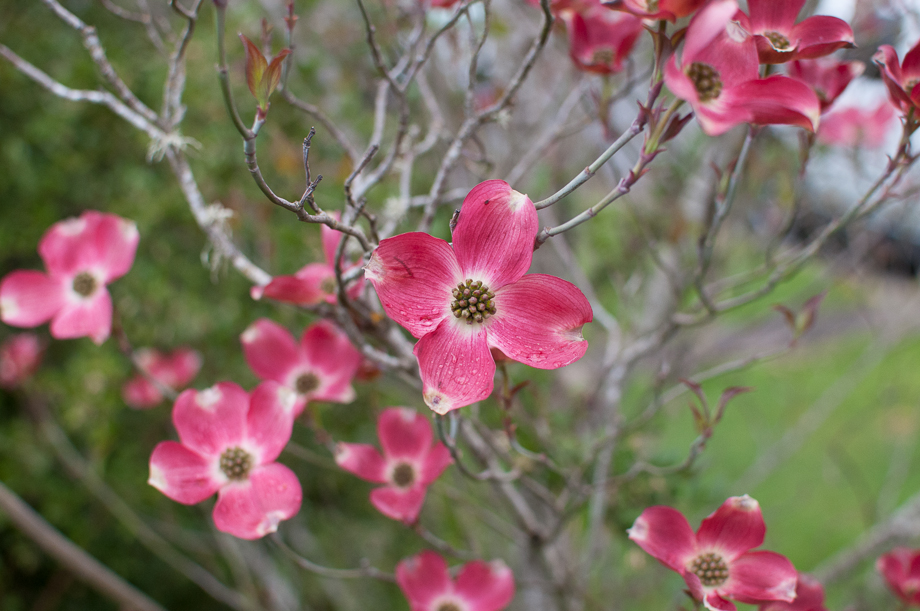
My dogwood is blooming now and it makes me so happy. It is such a beautiful flowering tree. I really, really wish I had room in my yard for a lilac, I see them around town and love the deep purple plum color so much, and the smell! But the dogwood has such a pretty shape and stays so small, I’m glad I went with it.
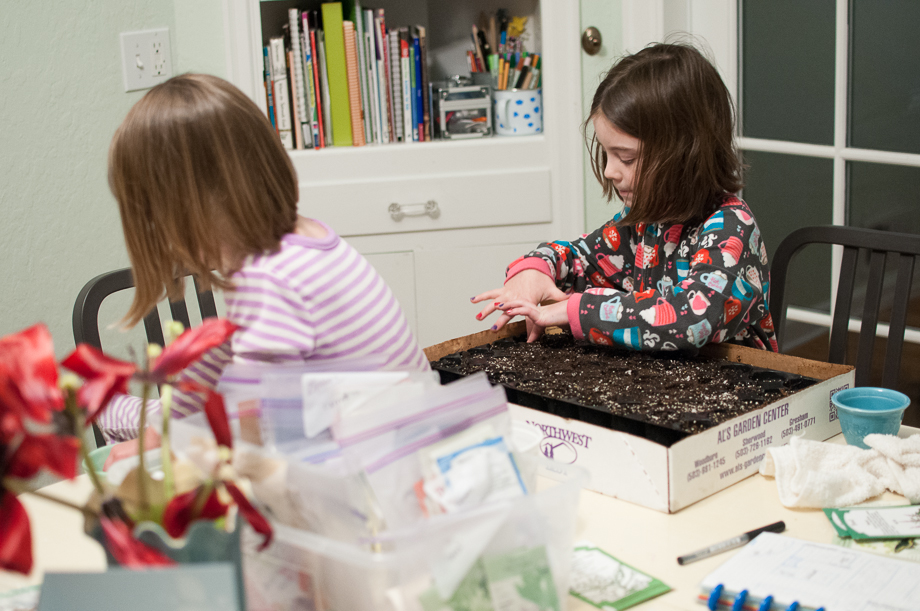
The girls came in with me and helped me start some seeds. Tuesday had some parlsey from Burgerville she reallly wanted to start. I love that they give seeds as the prize. She did spinach a couple years ago and they turned out great. I also started a few flowers and some herbs. I’m contemplating a light and heat mat set up (this and this). I don’t know where we would set it up though! I do like the idea of starting plants for myself, and everyone I know.
How does your garden grow this year?


recent posts
helpful info
archives
2 page layouts 8.5×11 layouts 12×12 layouts Alaska birthday birthday party brads canning Carmen Chloe crew girls dining room DIY elimination communication fair fall food front yard hair Halloween iPhone misting Montessori newborn nighttime night time oregon oregon coast oregon state fair organization painting painting with kids party portland punches ribbon salem Sciarrino scrapbooking sewing on scrapbooking Silhouette sleep toddler Tuesday tulips