Last year Tuesday had a car themed party. And she told me then what the next few parties were going to be, she had it all planned out. I did not expect her to remember or still want the train themed party that was next in the line up twelve months ago because it has not been all about trains any more. In fact I put the whole big pile of Thomas books away in storage. But she was like, duh, yes, I said a train party. So train party it was!

Hilariously she talked Bj into growing a mustache. He only had five days, but it was still quite noticeable. I guess some guy on the Thomas show has a mustache and she wanted Bj to be that guy. She actually talked quite a few people into doing things for her I’m realizing.

This is the only picture of the ticket I have, she had aunt Sciarrino design it to be punched. It’s awesome.

She had my mom make these gift bags for her friends. She wanted them to be “green bags with fun ribbons”. Each one is different. She filled them with a hello kitty thing (what are these called?), lip gloss, a pencil, four Christmas bandaids, and a blank “Happy Holiday Carols” book that she made each of them:

She was certain her friends would want these. I love the way young minds work in this way, “Surely if I am interested in it/like it, everyone else will too!”

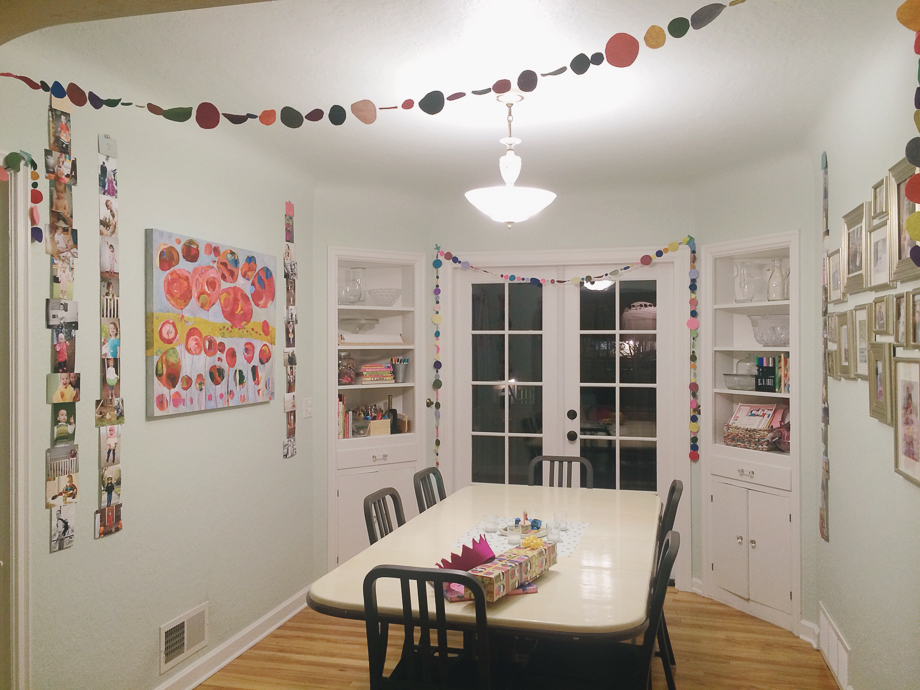
The kids came in and sat at a table and colored while we waited for everyone (I covered it with the awesome roll of paper from Amazon that I am still loving for everything). I am doing the rule, your age plus one for how many guests my kids can invite to their parties. It’s working great. Tuesday invited one boy, “Lachlan I’m inviting you because you’re so good at train set ups.” It’s true, he really is.

We got out ALL the pieces. People I went a little nuts and got a TON of track and trains when Tuesday was three (mostly big lots on eBay). I had a spreadsheet and everything. I don’t know why I thought she would love trains FOREVER, but I really wish I wouldn’t have gone so crazy. It was fun for this party though.

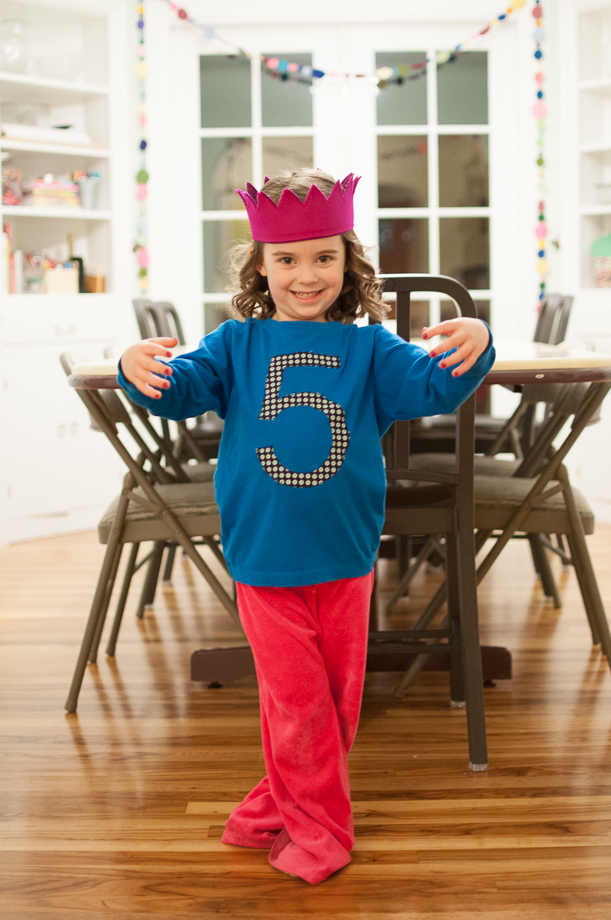
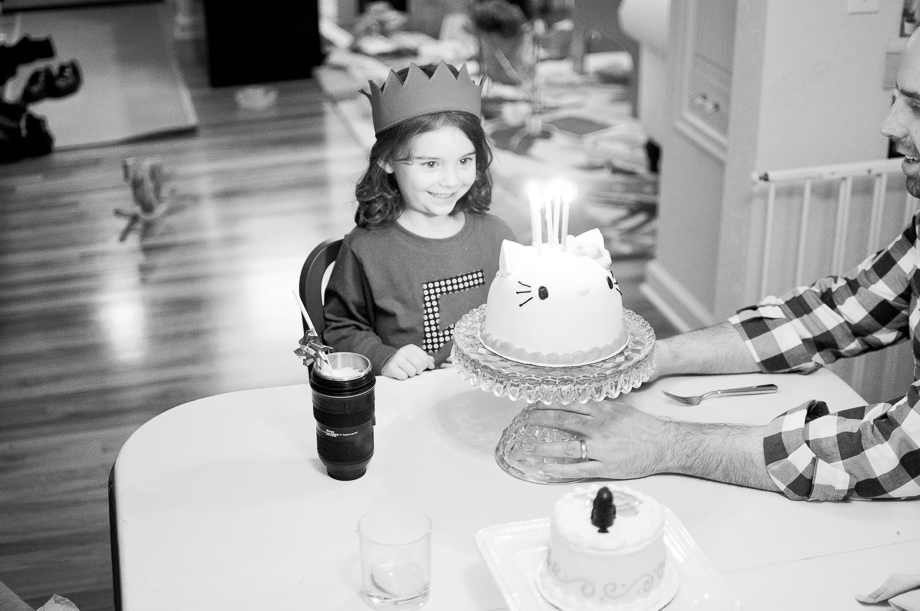
Lachlan was born two days before Tuesday so we went to his party earlier in the week. He had a cupcake cake thing in the shape of a race track with cars on it and I was like, “dude we’re copying that.” Tuesday requested it be in the shape of a five.

I managed to score the overalls for Bennie at the last minute (Goodwill $2.99), Tuesday’s we got at a train museum last summer, and mine were a gift. I borrowed the hat from a friend.

My sweet girl. She knows what she wants and how to get everyone to help her with her projects. We’ll see if she sticks to the schedule. If so we’ll have a bike themed party next year.

Celebrating crafts, kids and the everyday through photographs.
-
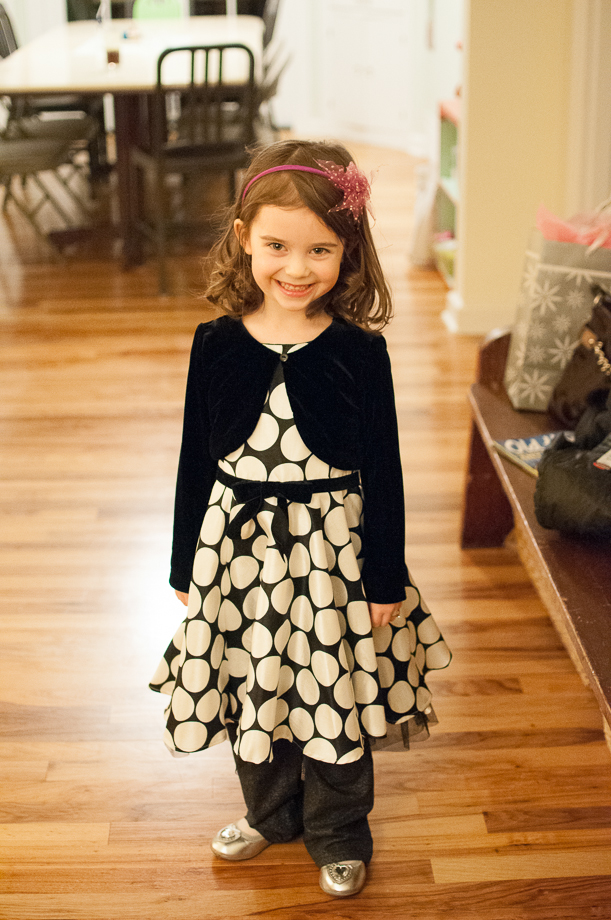
Oh sweet, sweet Tuesday, my five year old! How quickly it happens, as they all say. And I’ve loved every minute!
I celebrated her trips around the sun with pictures from five wonderful years, and had all this set up so she would see it when she woke up.
She was not as surprised as last year (the first year I did this), but loved it none the less. I’m glad I stayed up until one making the crown (a last minute decision). I used the PDF from this tutorial, but none of the directions. I assumed she’d want to wear it all day so I sewed it instead of using adhesive. I was right, she LOVED it.
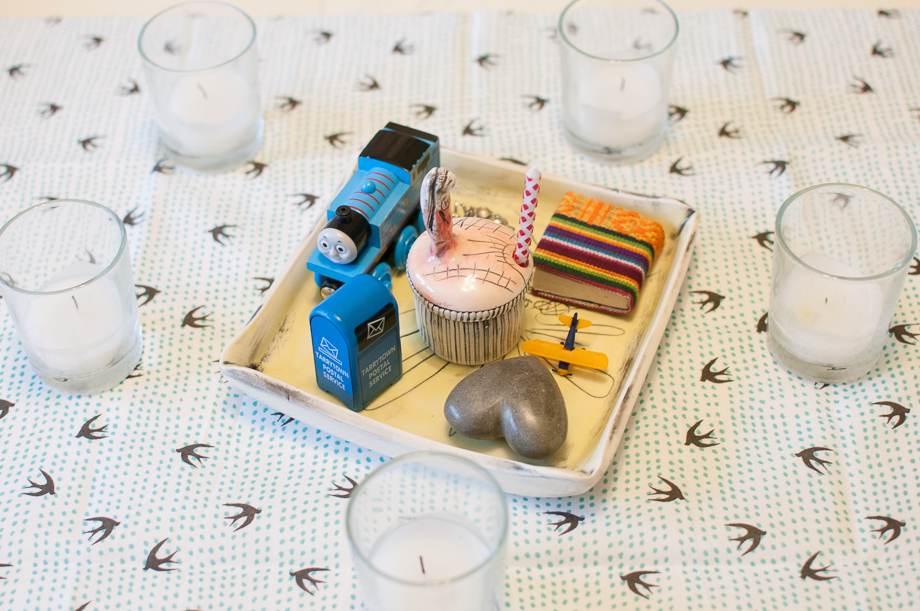
I fell in love with the Waldorf birthday ring idea, but just couldn’t justify buying one (though I came really close!!). I decided to set up something similar using stuff we had around. The candle in the middle is from a favorite artist of ours, Barb Campbell. The objects represent years. I had Tuesday walk around the table (the sun) for each year, talking about that year while holding up an object. I held up the plane first, “In your first year we traveled all over the country to visit friends.” then the book, “When you were one you learned to love books” the mini tea set (hard to see), “When you were two you loved to play with your indoor and outdoor play kitchens.” the train, “When you were three you loved trains.” the mailbox, “When you were four you loved to make mail and dress as a mail carrier.” The heart just symbolized how much we love her and how excited we are for what five will bring. She freaking loved this, it was a hit and for sure we will do it again.
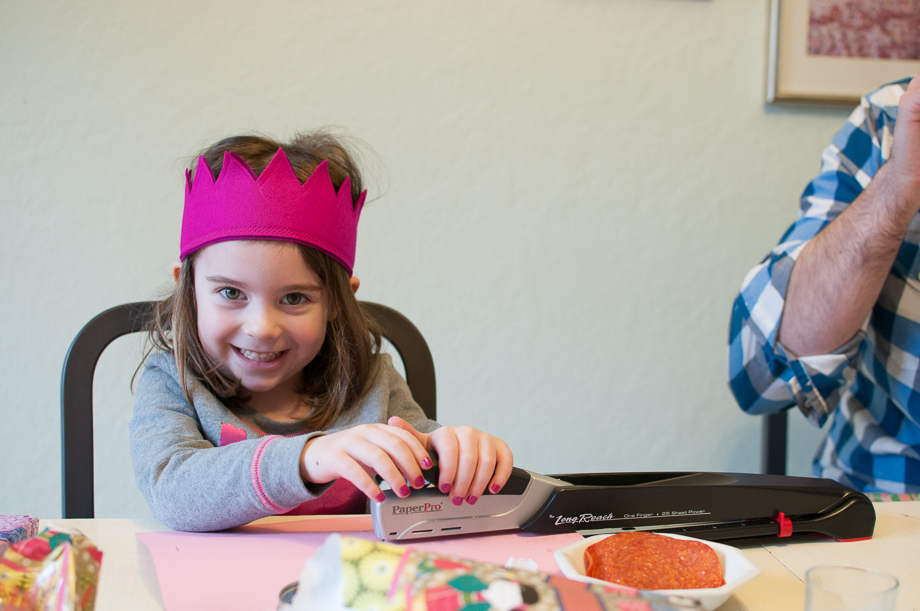
She got a long reach stapler, a book about making books, and a book about trains (found at Goodwill, a nice coffee table type) from us. She’s never asked for a specific present for a holiday, I honestly don’t think she realizes she could. So yay, we get to choose.
An ice cream cake. In addition to the candy and orange juice for breakfast. Dish of pepperoni slices for lunch, and homemade pizza for dinner (with warm frothed milk). Ha! When a five year old can eat whatever they want I guess that’s what you get!
My favorite thing to do is ask her the yearly questions. We do this just the three of us and wait until she is calm.
1. Favorite color? Bright Pink
2. Favorite toy? Tea sets
3. Favorite fruit? Strawberries
4. Favorite TV show? Thomas
5. Favorite thing for lunch? Pepperoni sandwich (bread, butter, pepperoni)
6. Favorite outfit? Princess dress up
7. Favorite game? Hide and seek
8. Favorite snack? Goldfish crackers
9. Favorite animal? My teddy bears
10. Favorite song? Itsy bitsy spider
11. Favorite book? Tales of a forth grade nothing
12. Best friend? AB
13. Favorite cereal? Cheerios
14. Favorite thing to do outside? Play in the mud
15. Favorite drink? Cold water
16. Favorite holiday? Opening Presents
17. Favorite thing to take to bed? A stuffed animal
18. Favorite thing to eat for breakfast? Cereal
19. What do you want for dinner on your birthday? Homemade Pizza
20. What do you want to be when you grow up? A sewer
21. What do you want to do when you grow up? To sew
Here is three, and four.
After a lovely family dinner the three of us headed to the symphony. We have season tickets for the 2013-2014 season, and it just happened to fall on her birthday.
It didn’t start until eight, and I worried that she wouldn’t make it (or wouldn’t be able to sit still!) with all that sugar in her bloodstream! But she did great; only loosing the battle to sleep in the very last movement of Beethoven’s Symphony No. 8 in F Major. Which was fine with this mama because I got to snuggle her while listening to beautiful music and thinking about all the things we’ve done, and all the great things to come.
-
Oh the things I have to update you with! I have a few posts in the hopper but I’m going to jump right in with a big one. My mama friends and I are starting a small little part time school! A forest school, a 100% outside in the weather (no matter the weather!) school. Right now we’re meeting two days a week, four hours each day, at a local park that suits our needs (near the water, and a place to make fire!).
Today was the first day.
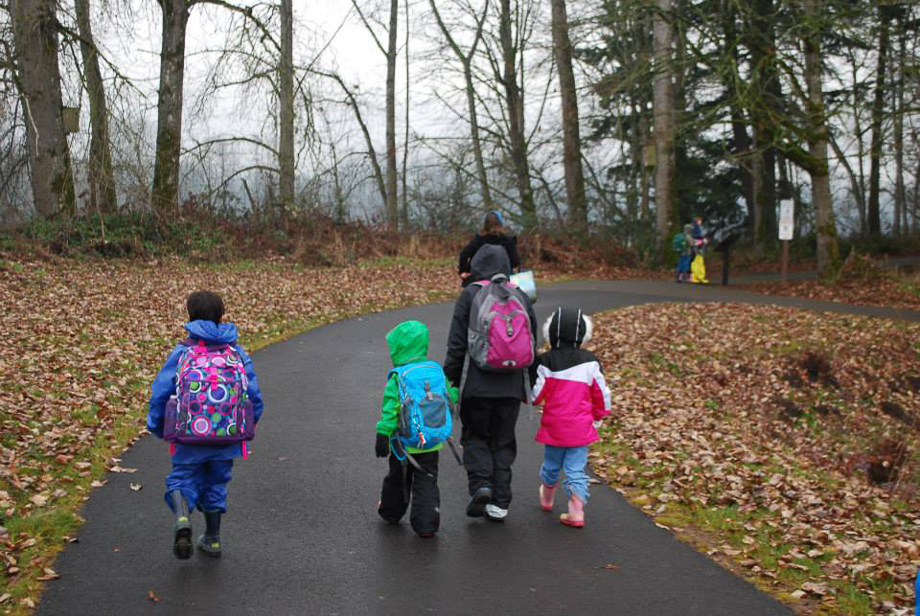
That’s Tuesday in the brand new rain gear (green jacket). She got a new backpack and pocket knife as well. As an early birthday present we took her to REI and let her pick those two things out. (some of these photo credits go to another mama friend, fyi)
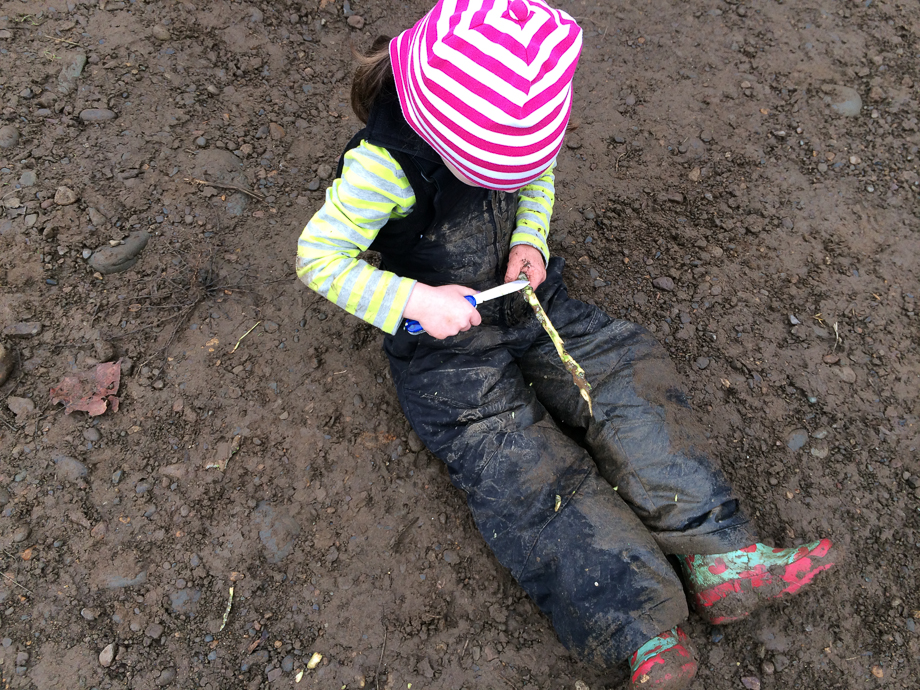
Tuesday using her knife for the first time.
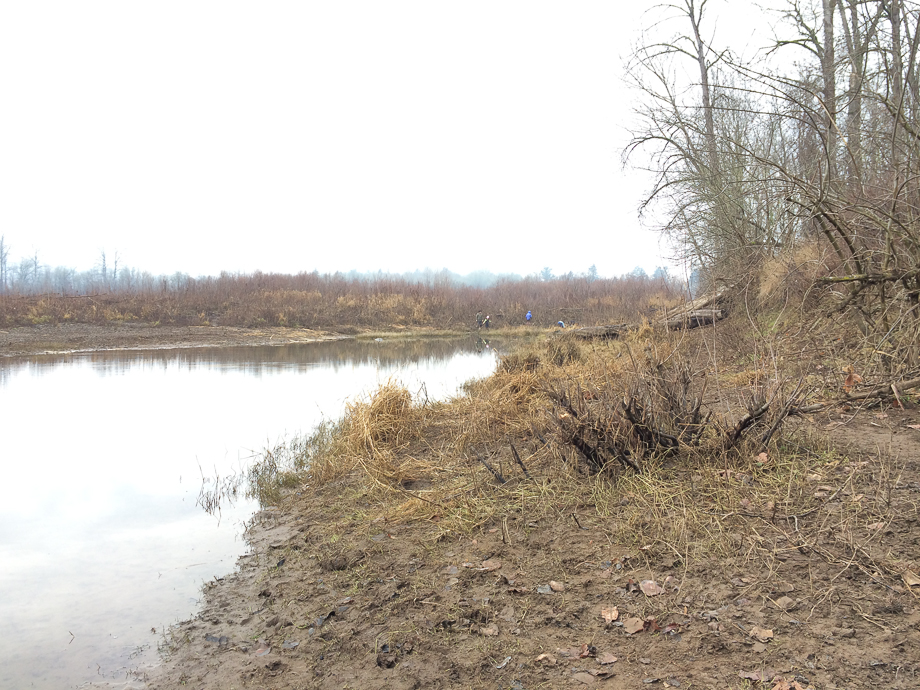
This is a small inlet of the Willamette River. Giving you an idea of where we let the kids wander.
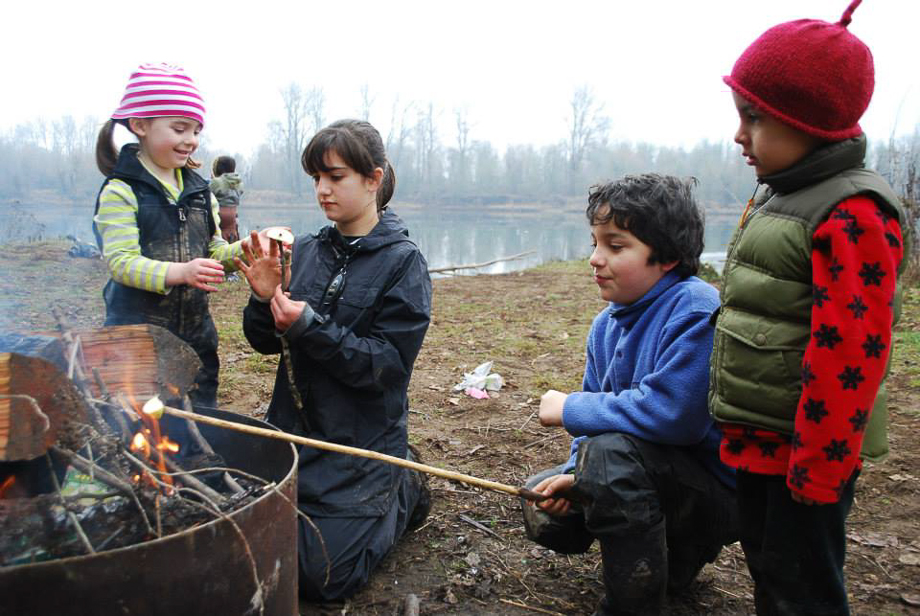
“We should try roasting an apple!”
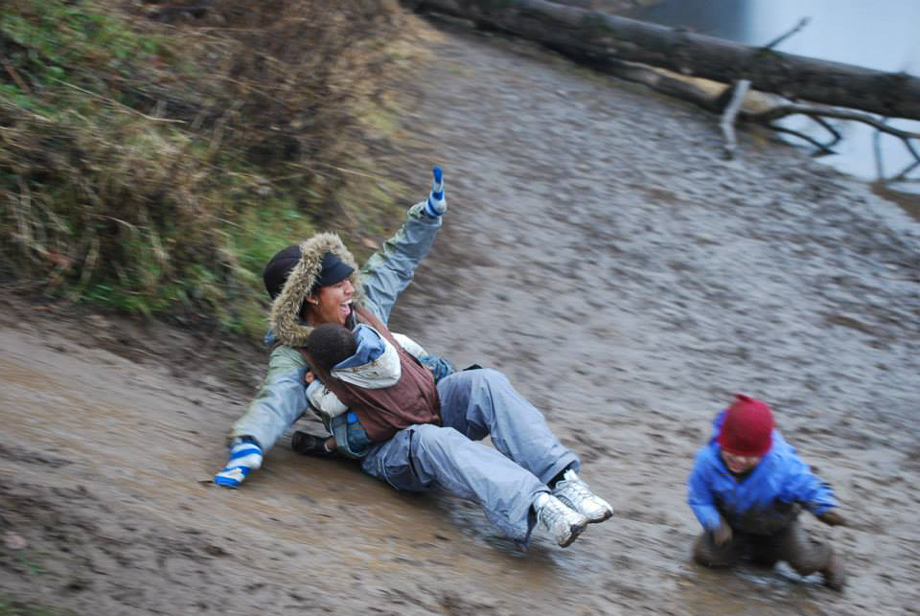
My friend! Her baby slept through it! Oh they were having a blast in this mud…
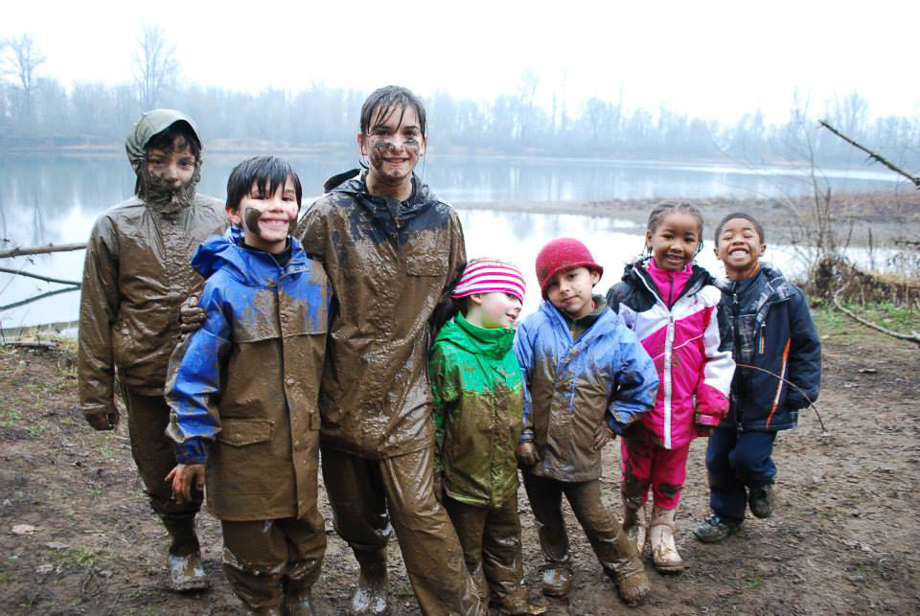
As you can see!
I’ve set up a little blog for Pax here, and we have a Facebook page that you can like if you like (ha!).
I should back up a little bit and mention how this all started. In December a friend posted about an outdoor kindergarten program. Another friend and I mentioned that we loved the idea, and had been thinking about it (here is a link to watch a short clip about outdoor kindergarten). We thought we might join with an established center, but decided a more free to play sort of structure was what we wanted. And since we’re homeschoolers we (the parents) really wanted to be involved in all the details. So we jumped in! I’m busy researching insurance, 501 (c) (3) status and a bunch of other things (yurts!). We may not know exactly what we’re doing all the time, but I can say one thing for sure; this might have been the best day of Tuesday’s life, and I love that.
No, excuse me, I have a bit of laundry to do.


recent posts
helpful info
archives
2 page layouts 8.5×11 layouts 12×12 layouts Alaska birthday birthday party brads canning Carmen Chloe crew girls dining room DIY elimination communication fair fall food front yard hair Halloween iPhone misting Montessori newborn nighttime night time oregon oregon coast oregon state fair organization painting painting with kids party portland punches ribbon salem Sciarrino scrapbooking sewing on scrapbooking Silhouette sleep toddler Tuesday tulips